This is already starting to feel like ages ago even though it took place less than a week ago. But I thought I’d share with you what we got up to at 9am on Sunday after the Awards dinner.
I began the class with the usual Power Point going over what to consider when planning portraits. We covered clothing choice, appropriate props, lighting patterns, white balance and more. And then we went into a lighting demonstration.
(Thank you to Lee Broders for supplying me with some images – I’ve never had any photos of me working like this before)
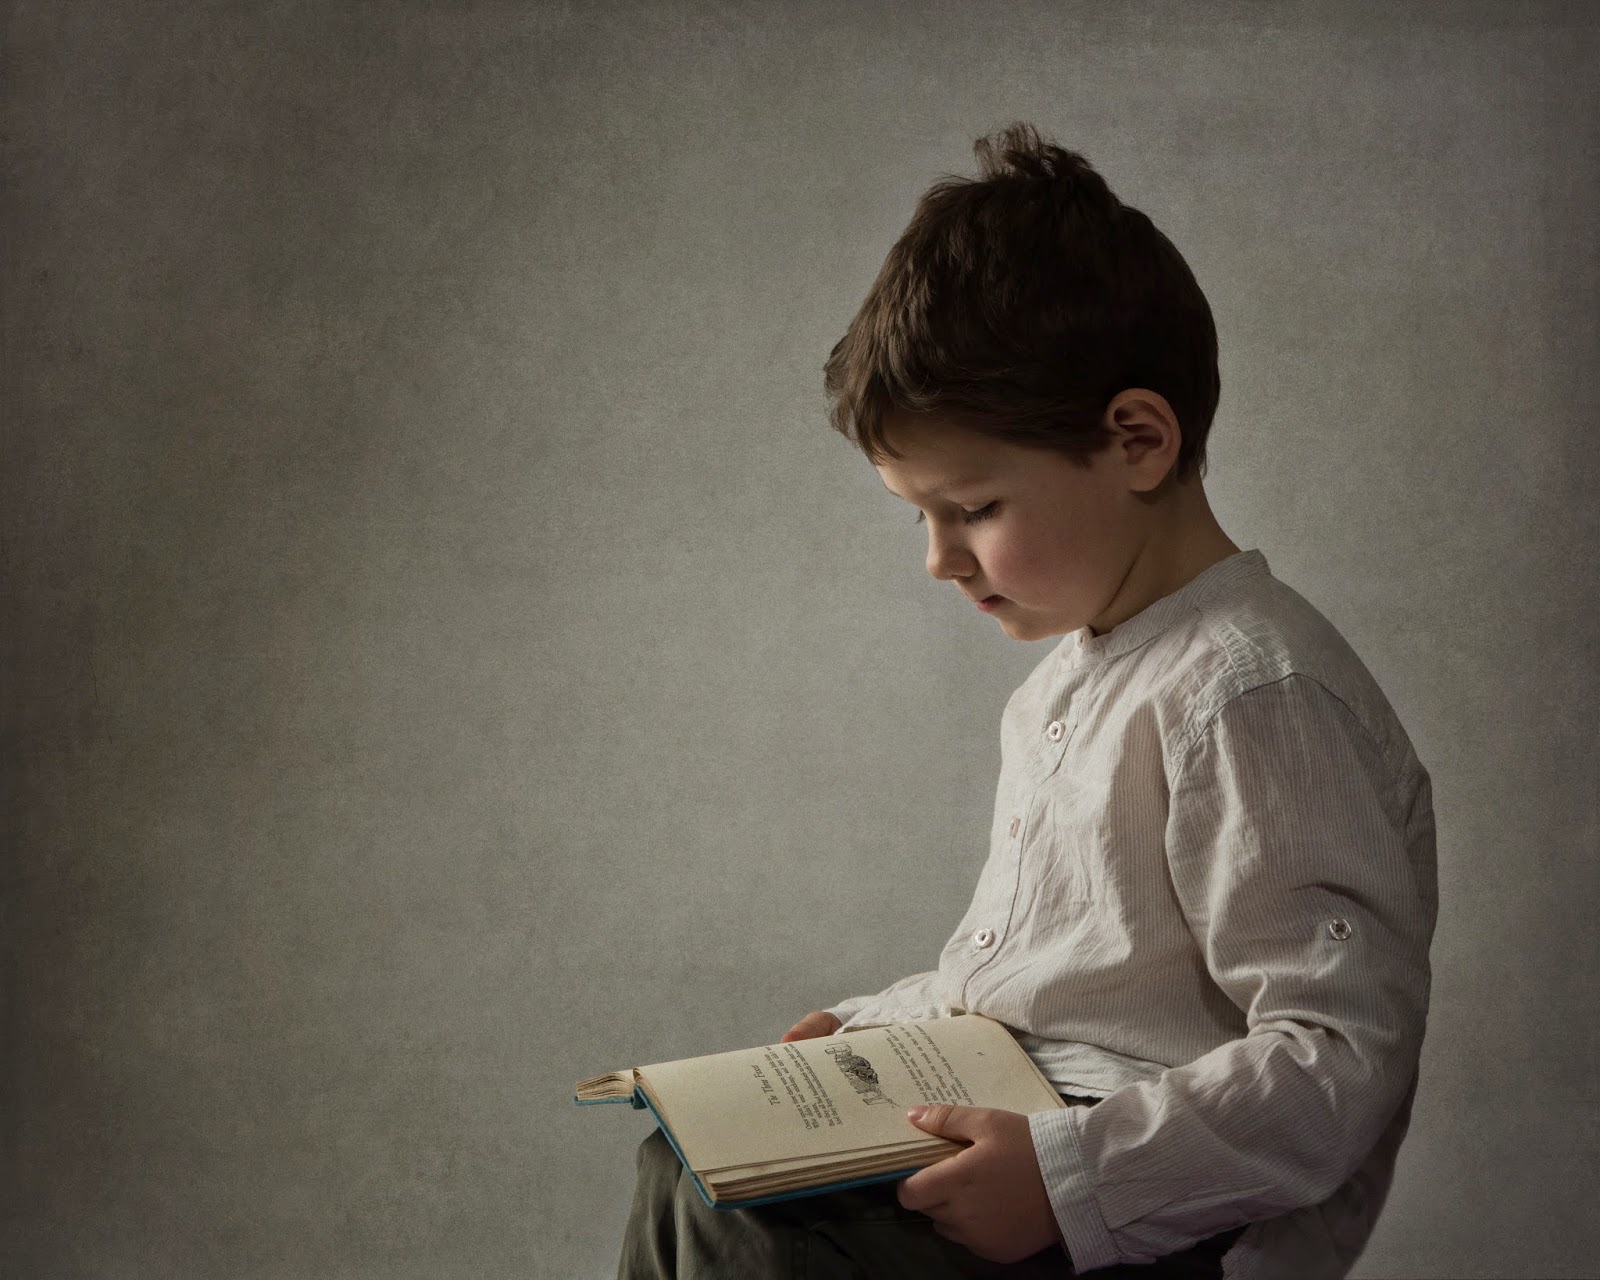
I was fortunate enough to have a wonderful little boy named Noah join us as my model. He made the journey from Leicestershire just so he could model for me (and enjoy a day out in London). I was so glad he came in the end because he did exactly what I wanted him to. He posed lovely in his usual sweet style and helped keep me at ease when demonstrating. You never know what you will get with children and having a room full watching isn’t the easiest place for a 4 year old to perform, but he did.
During this class we talked a bit about posing, lighting, sorting and processing. In the end there was so much to cover I’m not sure I did it all justice and perhaps next year this could actually be 2 separate talks. I’m sure I could have stretched this to 8 hours. I’m just not sure how best to break it up. Any suggestions are welcome.
I would like to share a few finished images. The first 3 illustrate the differences in fill intensity, as we briefly discussed during the class. I would have preferred a much stronger contrast between the 3 but hopefully this explains it well enough.
(A Strong Fill Light)
(Fill Light that I think is just right)
(No Fill Light)
Now as I said during the class, this all comes down to personal preference and the subject at hand. Consider the image you wish to create when setting your lights. The key light is where the correct exposure must come from. The fill light just opens up the shadows to the degree that you feel is necessary. And thankfully we shoot digital so its easy to see if we are getting what we want quit quickly. The more you get to know your equipment and your desired effect the easier it will be to set the lights without even thinking about it.
And here is another image where we tried to get the white background to go very dark. This is something that is easy to do with a little more space and a grid applied to the keylight to stop the fall off from reaching the paper. Unfortunately we were just a little too close and too much light was hitting the background paper. But hopefully you still get the point.
I’ve finished these images as covered during the class. This is also typical of the way I often process my own studio work and it is much the same as the work I did on my Fellowship panel.
For those in the class I hope you gained a lot from it. You are welcome to get in touch if you have any questions. And for those not in the class, maybe I will get to see you next year. I will hopefully be speaking there again. In the meantime if you wish to attend a class with me, either as a group or on a one to one basis please get in touch. You can reach me on 01455 611069 or email me at christina_lauder@btconnect.com.